


26 May Basement Renovation Guide

Basement Renovation Guide
Whether you are looking to create a fun living space, add more space to your residence, and/or increase the market value of your home, renovating your basement is an excellent option.
That being said, the renovation is in itself a long process. There are a number of steps that need to be followed in order to ensure the satisfaction and the safety of all homeowners in the area.
Knowing this fact is one thing, but understanding and putting a good plan into action is another. Many people have been there. You jump in to everything all excited, looking into ways to renovate your basement, but end up realizing that you have no clue where to even begin. What do you need to do? When will everything be done? What guidelines should you follow?
Having access to the internet and a vast quantity of information at your fingertips is a blessing, but it can also turn to make challenges appear more daunting and confusing then they actually are.
Luckily, this piece of informative literature is here to help pave a clear path for all those interested in the improvement of their properties.

This article will not only go through the general walk through the operation, it will also respond to popular google-searched questions like “how much does a basement reno cost?”, to save the curious readers time from wasting additional time.
After all: “Time is money.” according to Benjamin Franklin.
Step 1: Brainstorming
Prior to getting any work done, it is highly recommended that homeowners acquire an in-depth understanding of what the desired general layout of their basement is to look like, as well as the budget that should be respected.
Having the end goals and the final product already set in place is extremely important to keep the risk of any unpleasant surprises and/or mishaps (Both physically and financially) to a minimum.
“I don’t know how!... Where do I even begin?... How do you become an organized planner?”
If these thoughts are running through your brain, fear not. Provided below are some subjects and topics that can serve as guidelines to get you brainstorming effectively.

Budget
Ahh, money! The lack of this resource continues to present itself as a challenge in the lives of billions all across the globe. To get what is wanted, money is a necessity since all material and services on the market have a value attached to them. The concrete matter and the work that goes into the refurbishment of a home are, sadly, no exceptions to this rule.
When renovating a basement, every household needs to consider the range of their budget and the amount they can afford to spend. No one wants to go into debt, and nobody should. Although time-consuming, calculating the limit of a family’s “allowance” designated to renovation is probably the most important step of all. Once it is all figured out, clients can then move on to getting a feel for the prices by researching cost-related questions that fit their circumstances.
To help save some time, down below is a compilation of answers to popular search engine inquiries that may serve as guidelines.
1,000 ft2 would cost from
$40,000 to $120,000
depending on materials and special features
Time
Are you planning on taking a vacation? For how long? Is your scheduled packed already? Are you short on time for any reason? How long would it take to finish a basement?
All of this needs to be factored into your plans.
Make sure to keep in mind that the average basement finishing takes approximately 4-6 weeks to be completed by a professional contractor, so any travelling away from the residence before that time needs to be accounted.
Design
Why the renovation? What is the goal here? Before commencing the renovation, bear a design in mind. If you are in need of inspiration, searching up “basement renovations design ideas”, “remodeling unfinished basement ideas”, or “unique basement remodeling ideas” may help. Pinterest, instagram, and tumblr are great for this exact purpose.
Have certain specifications? Simply add a few keywords to that sentence like “Basement remodeling ideas on a budget” or “Basement renovation ideas for older homes”. The power of the internet is amazing, it’s time people take advantage of it!
Permits and inspections
What many people often neglect and forget to do is probably one of the most important steps of all. Making everything legal. In other words, obtaining the proper permits through inspection that approve of the work to be done. Why is this so important? It is a measure of precaution to prevent the construction of anything hazardous that has the capacity of bringing down and ruining a house (and possibly the surrounding areas). Think fire and structural collapse.
A: A basement renovation permit is needed if you are:
- Adding rooms
- Building/demolishing walls
- Installing Doors or Windows
- Creating a Fireplace
- Doing plumbing/electrical work
- Altering the original structure
A: The building referring to any structure with, a roof, a floor, and/or at least one structural system related to plumbing, fixtures, services etc...
A: Assuming that the tiny house is more than ten square metres and you are planning on doing some structural changes to it, the answer would be yes.
A: According to the Ontario Building Code no permit is needed if:
- The work doesn’t include structural/material alterations
- No additional unit(s) is created/demolished
- There isn't any installation of new plumbing
Step 2: Prep work: waterproof the space, mold removal, repairing cracks etc.

A: There are many factors that influence the total shown on the receipts, a few such as the:
- Sizing
More space = More manpower needed = More Time More Time = More money - Contractor
Some offer their services for more and others less depending on their experience, ratings, credentials etc. - Solution Type
There exists two main “types”. Exterior waterproofing, also known as the “positive side” projects, and Interior waterproofing “negative side” tasks. Each of them have about their own set of pros and cons, but the latter does tend to be on the cheaper side.
Speaking of interiors, this brings us to a common inquiry:
Step 3: Framing Basement Walls
Brainstorming? Check. Prep work? Check. What’s next you may ask? Framing!
The construction of any building or concrete structure, usually starts with making and putting the general outline in place.
A basement is no exception to this rule.
Framing the walls is one of the most important components in this sort of project. It is what defines the given space.

A: Framing can be summarized and broken down into these four steps;
- Installing the plates (2’ × 4’ boards)
- Marking everything (where the studs will be placed on the plates)
- Inserting the studs
- Repeating
NOTE: The actual process of interior basement walls framing can be rather tedious and complex. If any mistakes are made along the way, the situation may very well take a turn for the worst.
Due to this, it is strongly advised families hire a certified professional familiar with the task and the proper measures to take.
Nonetheless, if one is confident in his or hers abilities, there is no legal requirement that prohibits a DIY in this part.
P.S: Remember to seal basement walls before framing.
Common Inquiries
The R-value is what measures the capacity of an insulating material to resist heat flow. The higher number the better it is.
The R-value of concrete basement walls is 1.9-2.5, in comparison fiberglass is 3.1-3.4.
Step 4: Electrical wiring
After the brainstorming is finished, all the required permits are obtained, the prep work is completed, the framing done, finishing a basement electrical wiring becomes the next step to achieving your home goals.
Albeit, a rather complicated and possibly hazardous next step.


Installing electrical wiring in basement and underground areas can prove itself to be a challenge when a homeowner does not know the correct procedures to take. One does not simply place a bunch of cords into a plug when properly electrical wiring a basement (If it were that simple this paragraph would not have been included in this article).

It is HIGHLY suggested to hire a certified electrician to do the basement renovation electrical wiring. An electrician will wire your entire basement safely, set up a main box panel, and install all the switches and lights.
Common Inquiries
A: Three main wires often utilized are:
- 14/2 – White Wire – For lights/switches
- 12/2 – Yellow Wire – For plugs
- 14/3 – Allows control of lights w/ 2 different switches.
A: An outlet needs to be seen every:
- 900mm of empty space (width) on the wall
- 1.8m along wall behind countertops
- 4.5m along hallway walls.
- 900m from any endpoint.
Step 5: Drywall
We have come to there part where we form the interior walls of the house using drywall. Keep in mind, that it does take a rather long time to complete, so be prepared to put some back into your work.
That said, without further ado, let us jump into the details of the procedure and answers to the questions many people are looking forward to know.

The process
Before anything, it is essential to take precise measurements and calculate the area that will be covered by drywall. This is to ensure you don’t run short of boards or waste money on too many extras.
Next, renovators need to trim off any extra parts and sand down any rough edges prior to tacking and fastening the sheets in place with some screws.
Afterwards, you will need to go through a standard process called taping and mudding. This is essentially just placing paper or fiberglass tape over the joints between each board of drywall, then hiding the seams and filling the screw or nail holes with drywall compound.
At the end, be sure to sand it all down to achieve a smoother and more seamless look.
The Types of Drywall
Knowing which drywall type to use is almost as important as knowing how to use it. In the world of construction there exist a ton of different varieties of drywall, whereas many are similar and others are more unique. Each possessing their own pros and cons.
To facilitate the process of choosing, compiled below is a short list of some of the main types of drywall to help guide renovators into choosing the one that would best suit their needs.

Regular / Whiteboard
Thickness is usually ¼”, ⅜”, ½” or ⅝”, One side is white, the other brown.
Pros
Naturally fire retardant & is one of the most economic types on the market.
Cons
No special added features, therefore it may not be the best choice when looking for specific effects like reducing sound, preventing mold etc...
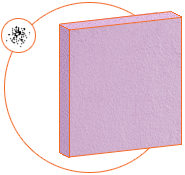
Mold Resistant Drywall
Thickness is often ½ or ⅝ inches, Usually coloured purple
Pros
Great for humid and places with high moisture levels since it is resistant against mildew, fungus, and mold.
Cons
More expensive than the regular variety.

Type X
Usually ⅝" in thickness, Core is reinforced with additional fibers, often covered in ivory-coloured face paper & a strong liner back paper
Pros
Highly ranked for being fire-resistant

Sound Proof
Similar to Regular drywall but layered with more material (gypsum, wood fibers...)
Pros
Better obstructs the passage of sound
Cons
Requires extra treatments to resist against other elements like mold buildup

Paperless
Veiled with fiberglass facings
Pros
Moisture-and-mold-resistant
Cons
More expensive per square foot in comparison to the regular type

Moisture-resistant board (greenboard)
Thickness is usually ½ or ⅝ inches, Specially layered on top w/ bathroom-quality paint or w/ cement board
Pros
Moisture-resistant, great for humid areas & places with water-pipes
Cons
Is not mold-resistant
Common Questions
Step 6: Painting, staining and flooring
Get excited! Now is the time to bring the entire room together with some finishing touches! That means painting, staining, flooring, and completing any needed woodwork (Like installing the doors, trimming, smoothening certain edges…)
Painting / Staining
Painting a basement is pretty self-explanatory so we won’t delve into much detail. Instead here is some basement painting tips that might help better the results:
- Paint in bright lighting
- Amass some basement painting ideas, get creative!
- Invite others to help out and get things finished faster (Makes everything 10x more enjoyable)
Now get to channeling your inner artist and paint your heart away!

FUN FACT: According to a study published by the Journal of the American Art Therapy Association, 45 minutes of creative activity has been proven to significantly lessen stress in the body, regardless of artistic experience or talent.
Flooring
From one house to another, the floors can be different. People have different preferences and there exist several types of floor materials. Some are more durable than others, others might be better looking... Point is they are all different in some way.
The most popular flooring in the GTA is carpet and laminate due to their easy maintenance and installation, but being common does not mean it is also the basement flooring best for you.
Simply analyze the basement flooring pros and cons and decide based on that. It really just comes down to your taste, needs, and budget.

Common Questions

To conclude...
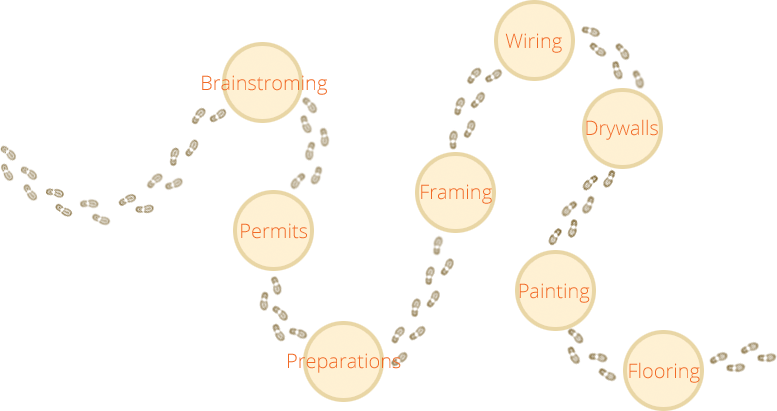
The steps for a new basement are: Brainstorming, applying for the permits, prepping the work, framing, wiring, installing drywall, painting, and flooring.
Remember, when in doubt,
ask a professional!
Hopefully this article has been helpful to any readers out there looking to renovate their basement.
And in case you need financing, check alternative small business funding at Greenbox Capital.

Christian Saunders, a seasoned marketing professional hailing from Toronto, Ontario, brings over 5 years of valuable experience to our team.
As a key member of our company, Christian plays a pivotal role in crafting compelling content that you encounter on our website and social media platforms. With a keen eye for detail and a passion for effective communication, Christian ensures that our brand's message resonates with our target audience. Beyond his desk, you might spot Christian on our job sites, skillfully capturing multimedia to enhance our visual storytelling.
Don't hesitate to say hello when you see him in action! Christian's dedication and expertise contribute significantly to our mission of delivering exceptional experiences to our valued clients.